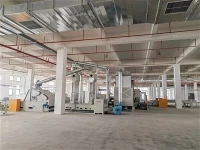
Hey there, fellow fiber processing crew! I’m Jake, been running a fiber opener supplier for about 8 years now, and let me tell you—nothing kills a production day faster than that weird, spotty fiber output mid-shift, or even worse, a full-on machine shutdown because some worn parts decided to call it quits out of nowhere. I’ve seen all the messes: clients panicking because their roving waste opener machine is spitting out clumpy fiber instead of clean, workable stuff, or their small fiber opening machine is making that god-awful grinding noise that makes everyone in the mill want to hide. Today I’m breaking down exactly how to swap out those worn parts yourself—no need to wait 3 days for a tech to show up, no need to drop a ton of cash on emergency service. I’ve walked so many mills through this, so trust me when I say this is doable, even if you’re more of a “fix-what’s-broken” guy than a “read-the-manual” person.
First things first—before you even touch a single bolt, safety can’t be an afterthought. I can’t stress this enough: unplug the machine, lock the power switch so no one accidentally hits it while you’re working, and throw those work gloves on. Those fiber blades are sharp, those metal shafts are heavy, and I’ve had way too many new techs nick their fingers because they skipped this step. Next, you need to confirm which parts are actually worn. Sometimes it’s easy: if the blades are chipped, or the bearings are leaking grease, or the drive belt is all cracked, that’s obvious. But other times, it’s subtle. If your roving waste opener machine is outputting fiber with way more neps (little clumps) than usual, or if the throughput is down like 20% even though you’re feeding the same amount of raw fiber, that’s a sign it’s time to check. Pro tip I learned the hard way: keep a tiny log of part wear—swap out blades every 6 months if you’re running 24/7, bearings every year, and the beater bars every 18 months. Catching it early saves you from a full machine teardown.
Let’s get into the actual steps, starting with the most common worn parts people deal with: beater blades, bearings, and belts. We’ll use two of our core machines as examples since they’re the most popular with small to mid-sized mills: the roving waste opener machine and the small fiber opening machine. That way, whatever setup you have, this applies.
Step 1: Access the main work chamber. This is where all the fiber processing happens, so it’s where all the wear happens too. For most models—including our small fiber opening machine—you’ll find two big bolts on the side of the chamber, plus a top hinge. Loosen those bolts, lift the chamber cover up and prop it open with a sturdy rod or a heavy metal stand. Don’t just hold it with your hand; those covers are solid, and if they slip, you’re going to the ER, not back to the mill. For the roving waste opener machine, the access panel is a bit bigger, so you might want a helper to hold it while you undo the 4 corner bolts—no need to risk dropping a 50lb metal panel on your foot.
Step 2: Remove the old worn parts. Let’s start with beater blades first—super common to wear down from constant rubbing against the grid or from hard trash in the raw fiber. The beater shaft is usually held in place with a set screw. Grab your Allen wrench, loosen that set screw, and slide the blade straight off. If it’s stuck, don’t bang it with a hammer (that’ll bend the shaft and cause more problems later)—spray a little penetrating oil, wait 10 minutes, then gently tap the edge with a soft mallet. Easy peasy. If you’re replacing multiple blades, label them with a Sharpie (like “Blade 1, Blade 2”) so you put them back in the exact same order. The beater shaft is balanced, so switching the order or installing a sharp blade next to a worn one will make the whole unit vibrate like crazy—we’ve had clients call us panicking because their machine was shaking the entire mill, and that’s why.
Next up: bearings. If you’re hearing that high-pitched squeal when the machine starts up, or if the shaft wiggles more than it should when you move it by hand, that’s your bearing going bad. For most models, the bearing is in the end cap of the beater shaft. Undo the 4 bolts on the end cap, pull the old bearing out. If it’s a sealed bearing, you can just pop it out; if it’s an open bearing, wipe out all the old grease first before putting the new one in. Quick tip: when you install the new bearing, don’t hammer it directly on the inner race—use a socket that fits the outer race, so you don’t damage the bearings right when you put them in. Same goes for the small fiber opening machine: its bearings are a standard size, so it’s super easy to get a replacement from our parts team, no need to wait for a custom order.
Belts are the easiest to replace, and they’re usually the first thing people check if their machine won’t turn on. First, locate the drive belt—for both the roving waste opener machine and the small fiber opening machine, it’s on the motor shaft and the beater shaft. Loosen the motor mount bolts, push the motor back, and the old belt will just slide off. Before you put the new one on, make sure it’s the exact right size. I’ve seen people grab a “close enough” belt and wonder why it keeps slipping off after 2 days. Also, check the belt tension: you should be able to press it down about ½ inch with your finger. Too loose, it slips; too tight, it wears out the bearings faster. Balance is key here.
Step 3: Install the new parts. Let’s recap: if you’re replacing beater blades, make sure they’re aligned correctly. Most blades have a flat side that faces inward towards the center of the beater. Tighten the set screw just enough so the blade doesn’t slip, but don’t overdo it—you’ll strip the screw, and then you’re stuck. For bearings, apply a thin layer of high-temperature grease before putting them in, and don’t over-grease it—just a light coat. Too much grease will attract dust and fiber gunk, which will turn into sludge and mess up the bearing faster. For belts, slide the new belt on, push the motor back until the tension is right, then tighten the motor mount bolts. Double-check that the belt is centered on the pulleys, not hanging off the edge—another common mistake that leads to premature wear.


Step 4: Test the machine. This is the make-or-break step. Don’t just close the chamber and hit start. First, manually turn the beater shaft by hand—you should feel smooth, even resistance, no grinding or sticking. If it feels off, take the chamber cover back off and double-check your set screws, bearings, belt tension. Once that’s good, close the chamber, tighten all the bolts, plug the power back in, lock the lock, and start the machine on low speed first. Listen for weird noises—if you hear grinding, turn it off immediately. If it’s smooth, no weird vibrations, then crank it up to normal speed and run it for 5 minutes. Feed a tiny bit of scrap fiber through (no production fiber yet!) and check the output. If it’s clean, clump-free, and throughput is back to normal, you nailed it. If not, don’t panic—go back and check your blade alignment or bearing install. I once had a client swap a blade and forget to tighten the set screw, so the blade spun 2 inches off center and made a huge mess. Easy fix once you catch it.
Now, a few pro tips from the people who actually build these machines (that’s me!). First, keep a spare parts kit on hand. For small fiber opening machine, our standard spare kit includes 2 extra beater blades, a bearing, and a drive belt—perfect for mid-sized mills that run every day. For roving waste opener machine, add a few extra grid bars too, since those wear fast when you’re processing heavy waste fiber. Having spares means you don’t have to wait for a delivery when a part breaks, which saves you hundreds of dollars in lost production.
Second, don’t cheap out on replacement parts. I know it’s tempting to buy a $10 blade from a random hardware store instead of our $20 OEM blade, but trust me—those generic blades bend easier, wear out in half the time, and can even damage your beater shaft. We had a client last year who installed a generic blade on their small fiber opening machine, and it bent the shaft so bad they had to replace the whole beater unit, which cost them $1,200. All because they tried to save $10. Worth it? Nope. OEM parts are designed for your specific machine, so they fit better, last longer, and prevent bigger problems down the line.
Third, schedule regular checks, not just reactive swaps. Every 2 weeks, when you do your regular mill maintenance, take 10 minutes to peek at your fiber opener. Check the blades for chips, the bearings for leaks, the belt for cracks. A quick check here and there will save you from a 8-hour shutdown because a part broke unexpectedly. I’ve had clients who do this and go 2 years without a major part failure, while others who wait until the machine is clunking call us begging for emergency parts.
Now, if this still feels overwhelming, or if you don’t have the time to do it yourself, that’s totally fine. Our team specializes in keeping fiber opers running, no matter the model. Whether you need OEM replacement parts for your roving waste opener machine, a full part swap for your small fiber opening machine, or even a technician to come out and do it for you, we’re here. We get that every minute of downtime costs you money, so we prioritize quick orders and fast support.
Wait, one last thing I can’t skip—common mistakes to avoid. First, not locking the power. I’ve heard horror stories of someone reaching in to adjust a blade and the machine turning on, leading to serious injury. Second, forcing parts. If a bearing won’t slide in, don’t hammer it—use a press or gently heat the end cap with a heat gun (not too hot!) to expand it. Third, forgetting to label beater blades. Like I said earlier, the beater is balanced, so switching blades messes up the balance, which causes vibrations that wear out bearings and other parts way faster.
At the end of the day, replacing worn fiber opener parts isn’t rocket science. It’s just about being careful, taking your time, and using the right parts. I’ve walked so many new mill owners through this, and most of them say it’s way easier than they thought. Now, if you need replacement parts, have questions about specific models, or want to chat about keeping your line running smoothly, reach out to our team. We’re here to help you avoid those mid-shift panics.
Before I wrap this up, a quick note: if you’re looking for more details on the machines I mentioned, you can check our official pages for the roving waste opener machine and small fiber opening machine linked here. Those pages have specs, part lists, and even short video clips of part swaps if you want to see it in action.
Now, go get that machine running smoothly. Happy processing, and hit us up if you need anything!
References:
- Textile Machinery Maintenance Handbook, 4th Edition. National Textile Association, 2021.
- OEM Fiber Opener Part Compatibility Guide. ABC Textile Equipment Co., 2023.
- Occupational Safety Standards for Mill Maintenance. OSHA, 2022.